Hugelkultur is basically soil over wood. Hugel beds can be any size, use different sizes of stumps and branches, and different decomposition stages of the wood & different types of wood. There are allelopathic trees that you would not want to dominate your wood. It is OK to have a little black walnut, spruce, or hackberry but these alellopathic trees should not predominate. Also, if you use mostly pine, you will end up with more acidity in the soil. This is great if you plan to grow blueberries, foxglove, and rhododendrons, but it may be tough for the high value food crops that prefer a more balanced soil.

Hugelkultur Sun Traps
Benefits of Hugelkultur
- Little irrigation is needed after saturation as the wood holds a tremendous amount of moisture.
- No fertilizer is needed as the wood releases nutrients slowly as it decomposes.
- The benefits of tilling are realized as the wood decomposition creates air pockets, but without the soil destruction and work of tilling.
- Lots of beneficial fungal activity
- Depending on the height of the beds, harvesting can be easier as you do not need to bend over quite as much.
- Lots of microclimates are created by the raised hugel beds. For example, your plants that require shade can be planted on the north side, while the sun plants can be planted on the south and west sides. Also, plants preferring drier conditions can be planted toward the top, and plants preferring wet conditions towards the bottom.
Plants that do Especially Well in Hugel Beds
You can plant just about anything in your hugel beds and they will do well, but there are certain plants that tend to do very well in a hugel bed. Over the years, I have grown perennials and annuals in my zone 1 hugelkultur beds. I have found that just about anything that I can get growing in the beds grow better than other areas of my garden. The only drawback is it is harder to get germination on the sloped sides, than my flat garden. Also, at the very top of the hugelkultur beds, it gets a bit dry for most things. This past season, the best eggplant and peppers I had were growing in hugel beds. Below are some plants that do especially well.
- Potatoes (Regular and Sweet)
- Cucurbit Family (Cucumbers, squash, watermelon, zucchini etc…)
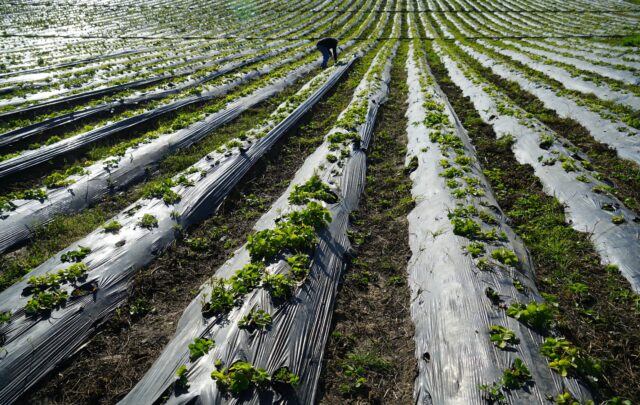
- Strawberries
- Raspberries
- Blackberries
- Most perennial fruit (I think woody perennials like the wood and fungal relationships)
How to Construct Large Hugelkultur Beds
1. Decide on the size you require. Remember the hugel beds will shrink down by 25% over the first year or so. I think 4-5 feet tall is a good size. The width at the bottom will be at least 2 to 3 times wider than the height depending on how steep you build the sides.
2. Decide on a location. Make sure the area gets sufficient light for the plants you wish to cultivate. Be wary of water flows, as you do not want to divert surface water with your berms to areas that may cause damage to property. Also, if you are on a very steep slope you may not want to build your berms on contour, as the water can collect and cause a mudslide.
3. Figure out where you are going to get your wood, and what type it is. Certain woods are allelopathic such as black walnut or don’t break down very well such as black locust. Other woods such as conifers are acidic. Allelopathic wood should be avoided as it will be toxic to other plants. Conifers can be used, but it would be a good idea to plant acid loving plants such as blueberries in that part of the hugel bed. A little of these types of woods is not a problem if mixed.
4. Be certain on the location and shape of the beds, as they will not be easily moved. Straight beds are boring, try curved beds for aesthetic purposes as well as the many microclimates it will create. I placed mine out on contour, as this will collect more water and matches my swales nicely. Also, the slope is not steep enough to be concerned about mudslides. Mark this out. Be careful not to use too much wood. I think no more than 35% of your hugel beds should be wood.

Hugelkultur in Progress
5. Lay out your wood directly on the ground, or dig the area out putting the soil aside to be applied on top of the wood. I prefer laying the wood directly on the ground as it is much less labor intensive. It does require bringing in more soil though. Sepp Holzer typically uses an excavator, so he will remove the sod, dig out the area, and then place the wood in the trench. After that he places the turned over sod on top of the wood, then sub soil, then the topsoil, and finally compost. He likes to build his beds very high and very steep, so sometimes he takes brush and then leafy branches and spikes it into the side to act as erosion control and cover for his seeds.
6. Add fill, leaves, turned over sod, or any other organic material.
7. Add subsoil, then topsoil.

Hugelkultur Berms Awaiting Compost
8. Add a good layer of compost, 3-6 inches.

Hugel Beds on Contour with Compost Added
9. Plant immediately. If you are not ready to plant your hugel beds yet, at the very least install an annual cover crop to hold the soil. You can use an annual pea or bean to help to build the fertility in the soil. I planted a variety of perennials and a few self-seeding annual herbs and fruits. I have seen video footage of permaculture people throwing out seed mixes on hugel berms. I decided to take the extra time to plant my polyculture based on the plants desire for varying degrees of sun, shade, moist, and dry conditions. I also planted the seed one variety at a time, so I could get the proper planting depth required for each plant. In this situation, where I am planting high value fruits and herbs it was worth taking the extra time to plant to ensure the best germination. I also made small terraces by hand when I was planting my very high value perennial fruit seed.
Plants on the South or Sunny Side
(Arranged from the top, which is dry to the bottom which is moist)
- White Yarrow- Nutrient accumulator, pollinator attractor, insectary
- Cilantro- Edible, Insectary, Pollinator Attractor
- Beach Plum- Insectary, Animal Forage/ Habitat, Edible
- Common Apple- Insectary, Animal Forage/ Habitat, Edible
- European Plum- Insectary, Animal Forage/ Habitat, Edible
- Golden Currant- Insectary, Animal Forage/ Habitat, Edible
- Fennel- Insectary, Animal Forage/ Habitat, Edible, Nutrient Accumulator
- Roman Chamomile- Insectary, Tea
- Parsley- Edible, Medicinal, Animal Forage
Plants on the North or Shady Side
(Arranged from the top, which is dry to the bottom which is moist)
- Chicory- Insectary, Pollinator Attractor, Edible, Nutrient Accumulator
- Hazelnut- Edible, Animal Forage
- Purple Coneflower- Insectary, Medicinal, Pollinator Attractor
- Seaberry- N-fixer, Animal Forage/ Habitat, Medicinal, Edible
- Serviceberry- Insectary, Animal Forage/ Habitat, Edible
- Garlic- Nutrient Accumulator, Edible, Medicinal
- Red Mulberry- Edible fruit, Bird Habitat & Forage, Dyes
- Bartlett Pear- Insectary, Animal Forage/ Habitat, Edible
- Wild Lupine- N-fixer, Edible, Insectary
10. Mulch over your seed. The problem with large hugelkultur berms is that it is difficult to hold the seeds in place on the steep sides and get germination. I used a biodegradable straw seed mat that I staked into place with sod spikes. The sod spikes were not necessary though as simple sticks shoved through the mat worked fine as well.

Hugels Planted & Mulched
11. If possible, it is a good idea to irrigate immediately to get the seed going to dominate the space with the plants you want, so others don’t take up residence. I am not irrigating yet as my fall seeding will lay dormant until spring.

Hugels Complete
Part 1 – Wood on contour, and adding the subsoil, and compost
See Part 1 of my hugelkultur project which includes laying down the wood on contour, and adding the subsoil, and compost. I mention in the video that the wood is from tree tops, but that is incorrect, it is simply uncut firewood.
Part 2 – Planting the Polyculture