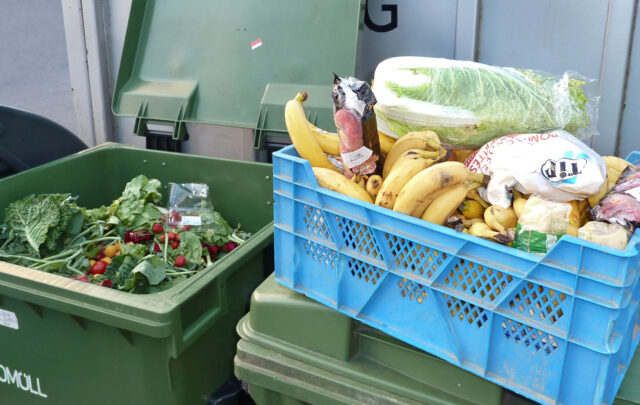
If ever there was a year to learn to save seed, I think this is it. So many people planted coronavirus gardens this spring that many seed sources ran out. Some seed-selling establishments considered seed “nonessential,” and restricted sales even when there was ample stock, simply to discourage people from unnecessary shopping.
In my book, seed is one of the most essential supplies. Saving them is just part of my ordinary round of gardening tasks, and doesn’t need to be intimidating. Of course there are some I don’t save yet, such as carrots. And there are some I can’t, such as new varieties I’m planning to try in the never-ending quest for a paste tomato that doesn’t get blossom end rot. But many of the beautiful things I grow in my garden are grown from seed I saved.

Field pea pods and seed on the left, asparagus (or yardlong) beans and pods on the right, and cantaloupe, watermelon and tomato in the middle.
If this is your first garden ever, pick something easy to save and give it a go! If you usually save a few varieties, I challenge you to save something new this year. And if you’re a semi-experienced seed saver like me, I suggest you save a larger quantity than usual. I’m planning on giving lots away come spring, whatever the state of the world. Even if seed is plentiful, free seed makes gardening cheaper and more accessible for my friends and neighbors.
First things first, make sure your seeds are worth saving. Many garden varieties are hybrids (they might be labeled “F1,” meaning it’s the first generation after hybridization). This just means their parents were genetically different from each other, perhaps wildly so. The seeds are probably still fertile, so you would get something from them, but the baby plants could have undesirable characteristics.
For instance, I once saw the product of a broccoli/cauliflower cross: a plant that made only tough, misshapen collard leaves. As another example, I planted six seeds out of a grocery store red bell pepper. I got two weakling plants that did not flower, two that flowered but made very small peppers, one that died and one that bent itself over and curled around the base of its pot. As an experiment, very interesting! But as a food production exercise? Failure.
So if you’re a beginning seed saver, flip back through your spring seed packets and see which ones are labeled F1, and which are labeled heirloom or open-pollinated. “Open-pollinated” means these varieties had parents that were pretty similar, so they will produce pretty similar offspring when they pollinate each other. “Heirloom” in a dictionary sense just means something handed down from the past. Open-pollinated seeds are often old varieties.
Speaking of pollinating, which seeds you can depend on yielding something yummy depends on which other varieties you’ve planted. Seed to Seed is the best source I’ve found for species-specific information. Some plants need 150 feet between varieties to keep the seed pure (such as tomatoes), some need a quarter of a mile (such as corn), and some effectively don’t need any at all, because they mostly pollinate themselves (peas).
That said, I plant my peppers and tomatoes all in the same row, half a dozen varieties each, and I save the seed from them. After four years, my tomatoes show no sign of crossing. A sweet pink slicing Arkansas Traveler is still sweet and pink, and a tiny Blond Girl is still tiny and yellow.
Peppers seem to be a little more promiscuous under my particular conditions. One year I got a Russian pepper that produced fruit with more of a habenaro shape, and this year my jalapenos are a little bigger and thinner-walled than strictly typical. I’ll choose seed from the plants that are closest to type, and leave out seed from the weirdos (this is called rouging).
Unless I get a really great weirdo, in which case I might work toward making a new variety! One of the best parts of seed saving is the opportunity to select over time for plants that suit your particular garden and your particular taste.
Easiest Savers
Watermelon
Cantaloupe
Pumpkin
Pepper
Dry beans
Dry corn
Peas
Dill
Cilantro
Malabar
I think the easiest seeds to save are from plants where the product you’re already aiming for is the mature dry seed, or where you have to scoop mature seeds out of the way to use the fruit. In those cases, you can just set some aside before you eat the rest, or before you send them to the chickens. If you’re new to seed saving, it’s hard to screw these up.
I dry watermelon, cantaloupe and pepper seeds on a plate before putting them in paper packets. My seed from cantaloupe and kajari melons planted right next to each other seems to have come out pretty pure, even though they’re very closely related. Peas should dry in their shells. Our grinding corn and dry beans for eating usually spend a little while in my solar dehydrator to prevent mold in storage, but I don’t do that with seed for planting, because the temperature is deadly. Remember, a seed is alive. It won’t sprout if it dies before it’s planted.
[slide-anything id=’3472166′]
Almost as easy are the things I frequently lose control of, including cilantro, dill and Malabar spinach. They grow so profusely and bolt so fast that I’ve got seed before I know it. Malabar makes funny little black berry-looking clusters. I just pluck them off the stem and set them on a plate to dry, without trying to pick the seed out of them. I harvest dill and cilantro both for the greens but also for the dry seed (dill for pickles, cilantro for whole coriander to spice our Indian-inspired favorites like curried goat).
In my garden, all three of these crops are on their way toward naturalization. I might gather a few seeds just so I can try and get an early crop going, but lately I’ve been letting them plant themselves, because they do a better job of it than me.
Intermediate-level Seeds
Tomatoes
Eggplant
Cucumbers
Summer squashes
Arugula
Lettuce
Green beans
All these vegetables take a little more effort, in my humble opinion. Eggplant need to be left a little past the nicest eating stage, and I’ve had trouble getting seed that will germinate. Perhaps I’m not leaving them quite long enough.
Cucumbers and zucchini/summer squashes also have to be left a little longer, and you’re going to want to choose just one variety if you want next year’s plants to be similar to this year’s. The good news is, a monster zucchini full of mature seeds can still be eaten, cored and stuffed.
Tomato seeds come out of the fruit covered in mucilaginous coatings that are attractive to fruit flies and prone to mold. Not a good situation for safe storage! I scoop out the seeds while I am canning diced tomatoes, and add a little homemade kombucha to them. The organisms in the kombucha digest the slime overnight, and in the morning I wash them in a fine mesh strainer, then dry on a paper towel. They come out pretty clean. If you don’t do kombucha, I think a little cider vinegar with the live mother included would work just as well.
Things like arugula, green beans and lettuce are a little more difficult simply because they must be left longer in order to get mature seed. The way I do this is to choose the best individuals in the row, and leave them when I clear the bed, making sure I’ve kept at least three or four (mostly in case some die, although it can’t hurt for cross pollination). Then I plant the next crop around them, so I’m not wasting a whole row waiting months for the seed to mature.
Arugula, like other brassicas, keeps its seeds in little pods called siliques. When I notice most of them have become dry, brown and brittle, I cut the whole plant and hold it over a newspaper, using a sort of squeezing, rolling motion to pop the pods and release the seeds. When I’ve done all the plants I tip the corners of the paper to bring the seeds and junk to the middle, then toss it just a little. The junk floats to the top, and can be gently brushed off.

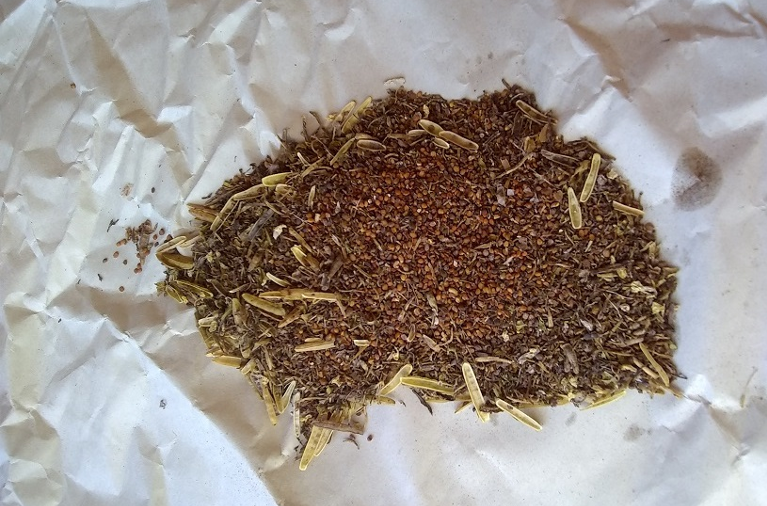
Arugula seed, almost clean enough to put in packets. Yes, that is a lot of arugula seed. In my experience it germinates well even after several years in storage.
They don’t turn out as clean as seed from a packet, but they’re plenty clean enough for my needs. I perfected this technique working for Duke University on a project that explored the influence of site on phenotype for some unassuming little wild brassicas related to arabidopsis. Oh, the many hours I spent harvesting seed!
Advanced Seeds
Biennials like carrots, onions and beets
Other stuff I haven’t attempted: broccoli, cabbage etc.
This year I think I finally successfully saved some beet seed. About a pint of beet seed, actually! My overwintered beets from last fall’s garden held very well late into spring, feeding us through our first coronavirus shopping break. There were a couple of individuals that looked nice enough to try and get seed from.
Because they were in the upcoming tomato row, I simply tied them to the tomato cages when they got inconveniently floppy. Two plants gave up after the flower stage and died, but the third made some nice looking seed. We’ll see how good the germination is in a week or two when I start the fall garden.

A great scraggly mature beet stalk, ready to be de-seeded.
Non-seed Saving
Potatoes
Sweet potatoes
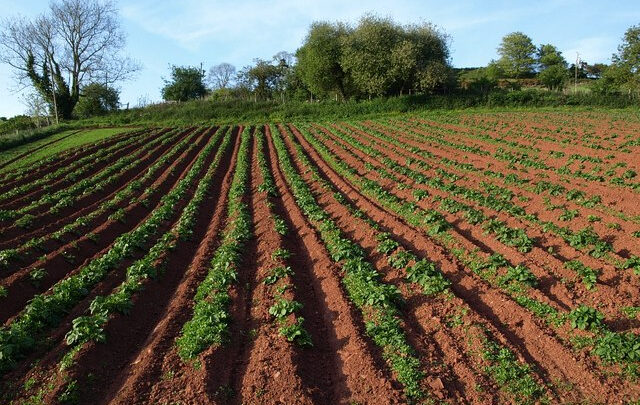
These crops are grown from the flesh of the plant, not from seed. This was my first year trying to grow potatoes in the hot humid south, and I had some good success. You can certainly save potatoes for next year. I used to do it all the time in Alaska. But because you take the tuber from the soil, store it, and put it back in the soil, the tubers can transmit soil-borne diseases to your new crop. It’s recommended to start over with clean seed potatoes every few years.
When you plant seed potatoes, you first cut them into pieces with two or three eyes on each piece. Then leave them out in the air overnight or longer to “heal” over the cut surface, so the tuber can defend itself from microorganisms in the soil long enough to establish a new plant. Obviously, you toss out any with obvious signs of disease (such as scab).
Sweet potatoes are similar, in that they sprout from eyes on the underground plant parts. I select a couple nice sweet potatoes from storage in April, and partly bury them in damp sand. They shoot up a bunch of lush green stems, which can be plucked off and put in water to root. I have also buried stems that had roots straight in the ground with good success. And I have buried stems that did not have roots, and those lived too. Basically, a sweet potato really wants to live.
Finally, a little note about buying seed. I don’t wait until planting time to get the seed I do have to buy. As soon as the weather cools off in October and I have a moment to think, I draw out next year’s garden and do my seed order. I check the racks at my local feed store. I always get ready early, but last year was the first year I was very, very glad I did.
Do you save seed? Can you give me tips on the more advanced varieties? One of my fondest goals in life is to save all the seed for my garden.