I thought I’d break out of my normal writings and talk about the nitty-gritty details of making a food garden work for you. Because the weather is getting colder, it seemed to me that a good place to start would be with season extenders and the use of microclimates, both of which are ways to have your food garden produce either earlier in the spring, or later into the fall. We are at the mercy of our climate, which is as it should be. Nevertheless, we have ways to push our seasons a bit, and most take very little effort and are pretty cheap and easy to do. Though things like greenhouses and high tunnels work very well, they can be very expensive and too big to fit on a small property. There are plenty of other ways to emulate the effects of greenhouses and high tunnels on a much smaller scale. Here are some ways I’ve come across.
Raise your beds
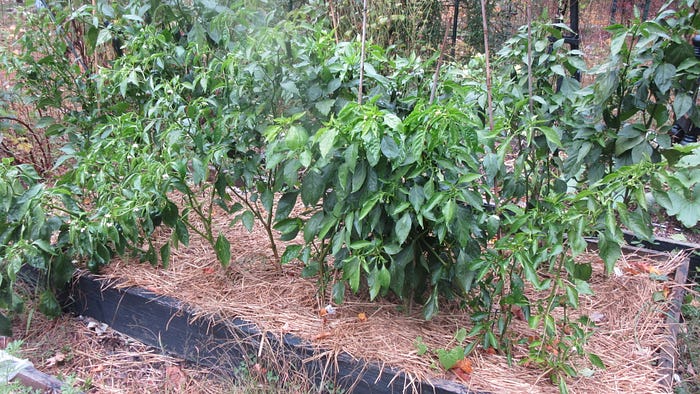
Raised bed in my garden
I like raised beds because I have rocky soil, which is a pain to dig and weed, and because I like dumping a whole bunch of good composty-stuff in them and making beautiful dirt. I also like them because they stay warmer in the spring and winter, and that gives me more time in the garden than I would otherwise have had. As you can see in the picture above, this raised bed contains hot peppers. We’ve had two frosts already, and a good number of nights in the low 40s. Though peppers in general are tougher than most people believe, these are still blooming, which is pretty cool. Many things in my garden are as happy as these peppers are without any additional coverings, because of the raised beds. Additionally, I paint my beds black, which I believe helps to get the beds warmer, sooner. This is a Swedish practice I read about and adopted. I like the cleaner look (I’m a bit of a garden snob), but more importantly, it works. On top of the painted bed, I’m sure you can see the generous mulch layer, which is also helps to keep the soil warm. There are actually two layers of mulch on this bed — a leaf layer, and an old hay layer on top of that. I have found that plants, if their roots are kept warm, are much more tolerant of colder temperatures in the air. Though this will only go so far, it’s a super easy way to push the season a little bit.
Rock Around the Bed
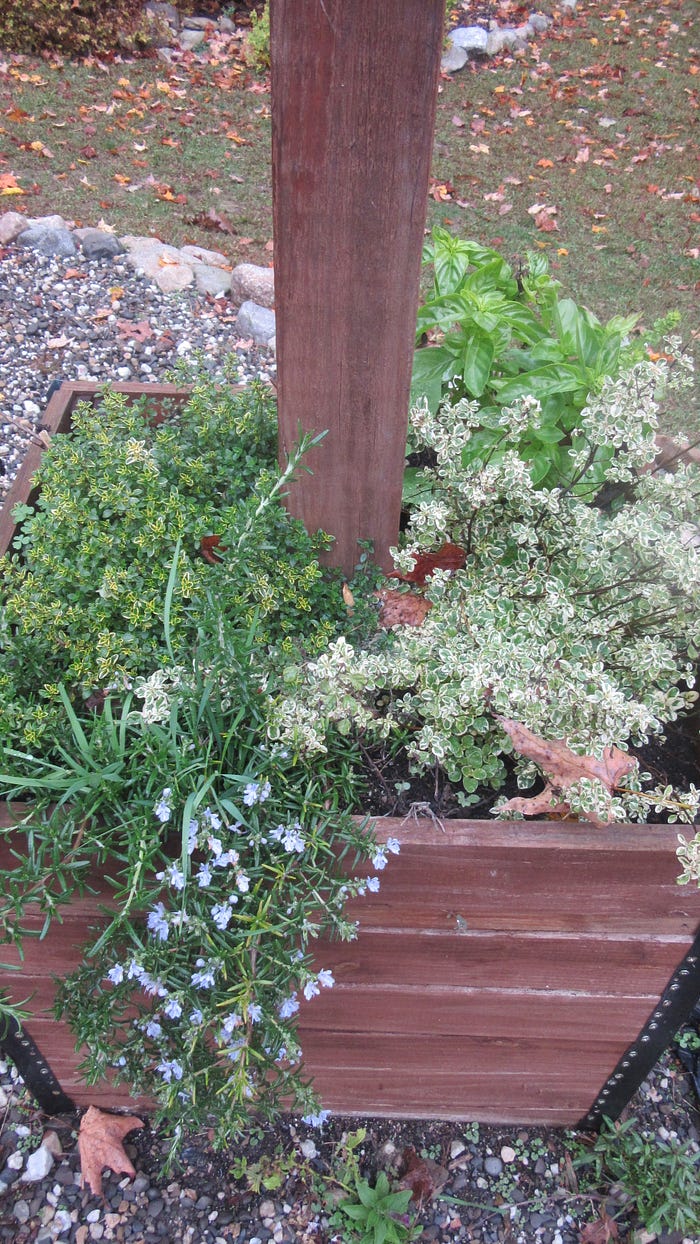
Herbs in the firepit garden (and volunteer Petunias and Snapdragons beneath)
Rocks absorb heat as the sun hits them and release it later on. I use rocks to edge my perennial beds, which gives them an edge, and I have seen that others have placed rocks right around tender plants to warm them. Gravel can serve a similar purpose. You can see from this picture that this is a raised bed placed in an area of gravel (our fire pit area, which used to be a pool). The plants in the bed are herbs; the rosemary in front is blooming, and the basil in back is looking great. This is surprising, especially with the temps dropping the way they have. Every year, whatever I plant in these planters blooms for far longer than plants planted in traditional pots elsewhere. I know the raised bed is helping with that, but the gravel surround is helping too.
Water as an Insulator
Water is an insulator, and can be used as such. My greenhouse is unheated, but inside it, in a raised bed, I have two water-filled black garbage cans buried up to their tops. The water in the cans heats up during the day in the sunlight, and the heat is released into the soil of the bed when it gets colder at night. I put tender plants near the cans so they will get the most benefit from this, but the cans work to warm the whole bed, nonetheless.
Use Your Walls
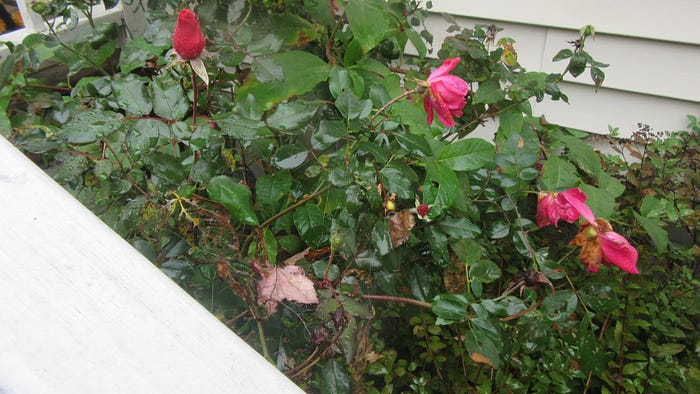
Pictured here is a rose that is growing between the porch stair and my house (there’s also a Pokeberry in it, but ignore that — I’m leaving it there to dye some wool with). It blooms early, and stays blooming late. It leafs out earlier than other things as well. This is because warm air gets trapped between the building and the stair, making that one spot much warmer than the surrounding area. Any wall will reflect heat back onto the surrounding area, warming it up, and can be used to nurture plants that might need a little extra. In fact, walled gardens are used quite often in countries with cooler climates. Though we may not be able to build a walled garden, we can plant some things close to a tool shed and use it in the same way!
Coverings
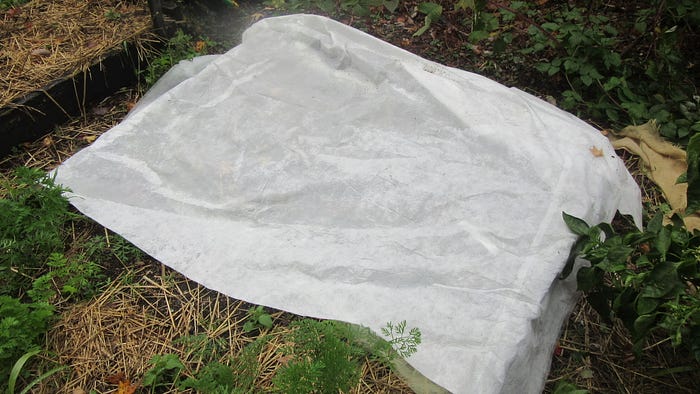
Frost blanket
There are many different types of coverings out on the market, to protect plants from frost. Pictured above is one type; a thin blanket that allows moisture through, but keeps the warmth of the soil down near the soil, instead of allowing it to escape out into the air. In this picture, it is protecting some young carrot seedlings from the overnight chill. I have also used it during the summer to keep moisture in my smaller plants, and it was very successful. I have a feeling I will be using these blankets for both of these purposes going forward.
Low Tunnels and Plastic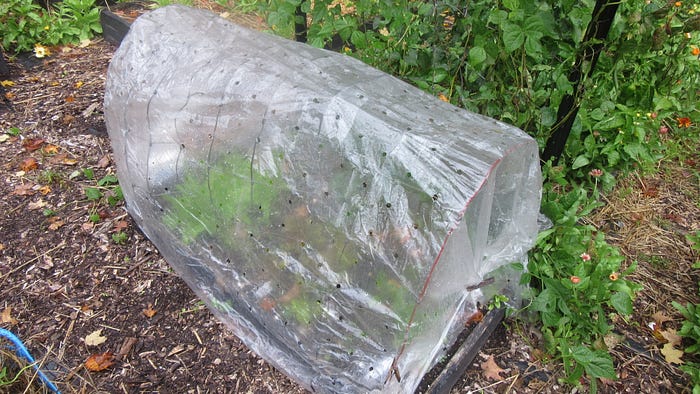
Low tunnel
Pictured here is a low tunnel, constructed from an old piece of livestock fence and a piece of grower’s plastic. However, I have used hardware store plastic tarps with equally good results (use a heavier gauge plastic rather than a lighter one, so they last longer), so grower’s plastic is not an absolute must have.
A low tunnel is just a temporary structure that goes over plants to protect them. I have low tunnels with mesh to keep bugs out, and I’ve used the frost covering I talked about above on a low tunnel when the plants get bigger to keep the warmth in without squishing the plants. I prefer low tunnels to cloches, because several plants can be covered with one low tunnel, and they allow for better air flow. Cloches look great, but they can only be used on one plant at a time, and you have to make sure that you remove them during the day, or you will cook your plant. The tunnels here are not really sealed, so they provide protection, but air still moves. If I forget to take them off during the day (and I do), nothing gets cooked (thank goodness).
Cold Frames
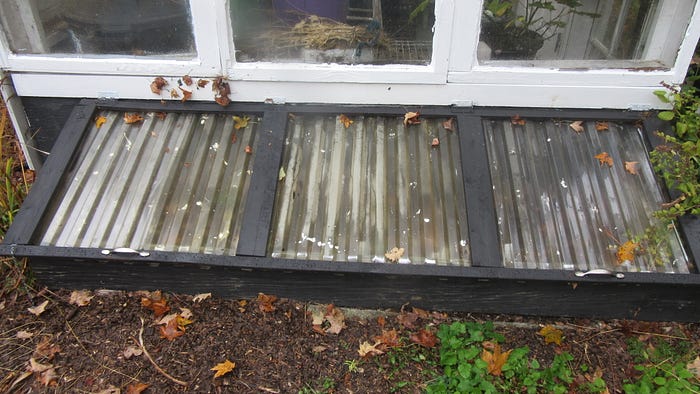
This cold frame is attached to my greenhouse, facing the south. It’s been well-loved, because it’s my go-to for anything that I’d like to grow during the times of year when things would just rather not grow at all. So yes, late fall into winter, and early, early spring. I use it for greens like winter-hardy lettuce, Mache, spinach, arugula, Corn Salad, and mustard greens. It works well because it is attached to a building, painted black, has the ability to transmit sunlight through the plastic on the top, and is facing south. It’s a quadfecta, if there is any such thing. However, cold frames do not need to be attached to anything at all, and a cold frame does not need to look like this, either. Many stand alone, and I have seen them made with old windows, old glass doors, wood with a top such as this, etc, in many configurations. Some are permanent structures, such as this one, and others can be moved. Happily, these things can be made out of scraps, which is what this one is made from (leftover greenhouse roof from my greenhouse here on this one-I HATE throwing things like that away). In fact, I just rescued some old half windows from a house down the street, and I have in mind a square structure where the walls are windows and the top is hinged. It would be like a mini-greenhouse that could be placed onto an existing bed. I’m still thinking about how I want it to look, but how can you beat something that is so useful, and made out of garbage? It’s the way of the future, people, it really is.
These are some ways that crops can be kept safe during colder temps, or started earlier in the year. Bottom line is, that as long as you can keep the air and soil temps higher than the surrounding areas, you can grow things earlier or later in the year, and even grow things that are out of your hardiness zone (within reason). Happily, it’s pretty cheap and easy to do — you just have to do it. If anyone uses a method I didn’t talk about here, please feel free to share it. Likewise, if you have any questions, please feel free to ask. Thanks for reading and see you next time!


