When I first met my husband the Data Fiend (DF), we were dual income/no kids with oodles of time on our hands. Being frugal, home-centered people, we hiked all the trails and cooked a lot together. I recall one of our first genuine disagreements occurred in a week when he had to work more than I did, and in my boredom I, gasp, made the ice cream without him. How dare I.
We got this book called Wild Fermentation by Sandor Katz. I love this book because it transforms home fermentation from mysterious and scary into easy and accessible. In the bliss of new marriage we made kimchi, honey mead and a beautiful savory crepe-like thing called dosas.
Then we had the baby who never ever slept, and a lot of things fell by the wayside. I quit my job but somehow we had less time, not more. Dinners went from fancy all-day affairs to “pasta with stuff.” No more dosas or mead were made.
However, a few fool-proof, easy, essential home fermentations survived the many years of no sleep and are still present in my kitchen today. These are simple things with only a few steps. The microbial communities are robust and resilient, so they can be neglected for days or weeks and then brought back to life. They yield more than one product we find useful. In short, perfect ferments for beginners.
Since we’re all home now flattening the curve and getting bored in the kitchen, I thought I would share them with you.
Sauerkraut
I thought I hated sauerkraut. Turns out, what I hated was canned sauerkraut. This makes sense, because I despise all sorts of canned versions of things I love in every other form. Raw spinach? Great! Cooked spinach? Fine! Canned spinach? NOPE. I’d much rather eat edible weeds. Ditto canned corn, canned green beans and even canned pumpkin. Nopity nope-nope, as I say to the kids when they are heading for a bad choice.
Fresh sauerkraut is a completely different from canned. It’s crunchy, not limp. It’s salty, not cabbagy. It’s as sour as you want it to be. It’s gingery and garlicky and oniony and hot peppery, because I put all those things in mine, although you don’t have to put them in yours. It’s customizable!
[slide-anything id=’3472166′]
You can add all sorts of excess garden or farmer’s market produce, from carrots to parsnips to extra radishes, kale or kohlrabi or daikon or Chinese cabbage. Any vegetable matter that is fairly sturdy will do (although I have not tried beets). I personally adore a version called sauerben, which is almost entirely turnips. Delicious.

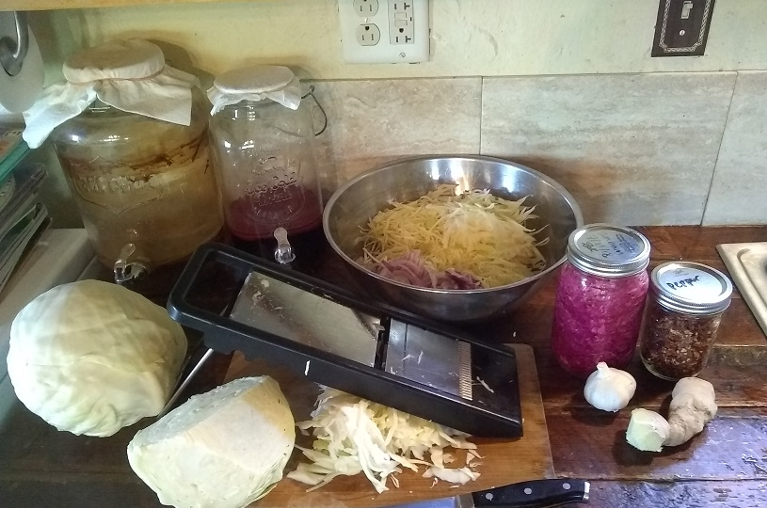
Sauerkraut with all the flavorings. That quart jar of pretty pink stuff to the right is the last of the previous batch. Getting down to one quart constitutes a sauerkraut emergency at my house.
Wild Fermentation begins with sauerkraut because it is so easy. The basic method is to wash the veg and trim off any part that doesn’t look yummy, like tough outer leaves or brown bits. Then shred it, salt it and allow lactobacillus to accomplish the alchemy. A mandolin is helpful if you’re doing a big batch, but not really necessary. You don’t need any “starter” (in fermentation, the material that introduces the correct microbial community to the substrate) because the lactobacillus are already present on the surface of the veg. You only need enough salt to kill off the microbial species that cause sliminess and off flavors.
Rotting is when all the microbes that can get at a bit of food consume it all together, producing a mess that no human wants to eat. Fermentation is when we alter the conditions so that only the microbes we prefer are able to get at the food, producing deliciousness. Fermentation is controlled rotting. In lacto-fermented products like sauerkraut, the control is the salt.
Three tablespoons of salt to about five pounds of veg is a good starting point. Over years of making sauerkraut, I’ve backed the salt down. Mix it thoroughly with your shredded veg, and let it “relax” for a little while. The salt draws the water out of the veg, making it limp and easy to pack.
We have a very nice one-gallon sauerkraut crock, but I often just use quart jars, especially if I’m making a small batch. The liquid should rise to cover the veg within about 24 hours; if it doesn’t, you can make up a little salty water to slosh over the top. I put the lids loosely on the jars and set them in a tray in because they overflow. Every day I mash the cabbage down under the water. You can skip this step if you weight the cabbage with a smaller jar full of water, which fits in the mouth of the quart jar. Of if you use a crock with a weight.
It’s very easy to tell if something has gone wrong with sauerkraut. If it smells and tastes nice, it won’t harm you. If your kraut goes brown and gets the dry smell of alcohol, you can wait until it gets sour and still eat it. It’ll taste a little different, but I’ve never come to harm from it. If it gets moldy on the top, you may have let it go a little long. You can scrape off the moldy portion plus about another inch and eat the nice stuff underneath. If it’s slimy and rot-smelling, either the cabbage was exceptionally poor quality or you under-salted. Compost the result and try again.
As an additional indicator of success, I usually use two nice big heads of cheap green cabbage and one little red one. A compound in the red cabbage acts as an acidity indicator: purple under neutral conditions, blue under basic conditions and brilliant pink when the mixture gets properly acidic. You may remember using purple cabbage in high school chemistry to test the pH of various solutions.
When I pack it into jars the kraut is a mixed-up white and purple color. In a day or two it’s all a little more purple, as the water rises and saturates the jar, or possibly a little blue if I’ve added lots of ginger. It’s starting to bubble as the bacteria consume the cabbage’s sugars and produce gas. By day four the mixture is a uniform bright pink and I can be sure a safe and healthy acidity has been achieved, although I always let it go longer because we like strong sour flavors.
Other things I add, such as garlic, ginger, onion and chili pepper, only further ensure the right bacteria (and only the right bacteria) are present. But I add them mostly because they taste nice.
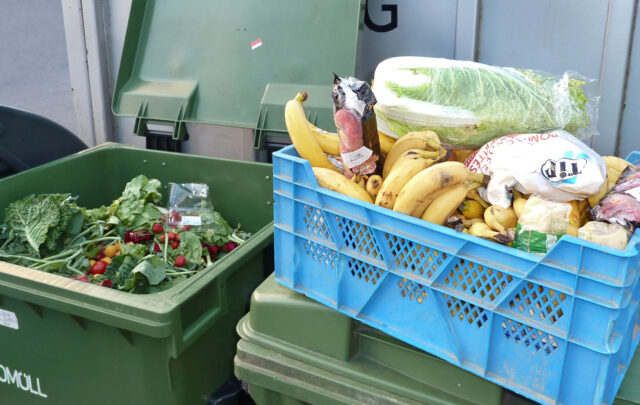
Homemade sauerkraut will keep for weeks in the fridge. It’s great with bratwurst or corned beef, but we usually eat it next to our breakfast eggs. Since the coronavirus lockdown went into effect I haven’t been to the grocery store, and I’ve stopped cutting the kids off at one or two piles of sauerkraut. It’s amazing how much they will eat.
Kombucha
Another ferment we have kept alive through babies and house-building is kombucha. You can buy it bottled up with all sorts of fancy flavors. We originally cultured our pellicle (or scoby) from one of those store-bought bottles, but this takes some time. You may be able to find a pellicle ready to go among some of your friends (you never know who is a closet home fermenter!) or on Craigslist.
The pellicle is a slimy mat that gets thicker with every batch of kombucha you make. It may look gross but it’s just cellulose, a home the microbes build for themselves just as tiny corals build themselves a reef out in the tropical sea. As it gets thicker over time, simply peel off the older layers and compost them (or let them dry and have the kids draw on them). People are working on all sorts of products made from kombucha pellicle.

Here is what my counter looks like on a regular day, when it isn’t cleared for sauerkraut-making. To the left are the two jars for kombucha, one caffeinated and one less so, with half-gallon tea for new batches ready to go out and steep in the sun. To the right are two quarts of apple scrap vinegar cultured from kombucha, with a home-made fruit fly trap on top. In the middle is a pint of kefir ready to be strained, and a quart of sourdough starter cultured from kefir.
The basic method is to acquire a pellicle and add it to brewed, cooled sweet tea. One gallon of water to eight bags of black tea, with one cup of sugar dissolved in it. The microbial community consumes the sugar to make the acid, getting the rest of its nutrition from the tea. Leave it for several days to two weeks, depending on your taste for sour, then decant into bottles, reserving the pellicle and a cup of the liquid for the next batch.
Finished kombucha from black tea contains some caffeine. We also make a lower-caffeine version for the kids, because we vastly prefer them uncaffeinated. The kombucha community does not thrive as well on other types of tea, but you can use green, white or zinger teas. We grow the annual hibiscus that lends the red color and sour flavor to Celestial Seasonings zingers, so I use that with just one bag of black tea. It makes a pink, fruity kombucha.
Lots of people say kombucha is a superfood. I’m skeptical that the store-bought versions are very good for you, because most of them have plenty of added sugar. Finished homemade kombucha doesn’t have much, because the bacteria has consumed it.
We drink kombucha because we like it, not for the health benefits, whatever they may turn out to be. We did notice, though, that after drinking homemade kombucha for a while, DF became much better able to tolerate eating beans. I assume some beneficial modification of his intestinal microbiome must have occurred.
I like kombucha best for its other uses in the kitchen. It makes excellent homemade fruit fly traps. When it gets forgotten in the busyness of summer and becomes strongly vinegary, I use it to ferment cucumbers into our favorite pickles (which sometimes turn out pretty seriously carbonated). And I use it as starter for apple scrap cider, a fizzy favorite that can then become apple scrap vinegar. Having a vinegar production system on my kitchen counter is very valuable.
Kefir
Here is another one that needs a specific starter, a lump of spongy polysaccharide called “kefir grains,” which the bacterial community builds for itself just like kombucha builds the pellicle. Kefir grains survive best in whole milk but they can also be used to ferment soymilk, sugared water, coconut milk and other substances. Look for them among your friends or on Craigslist.
I originally acquired kefir because I had a miserable yeast overgrowth. It started when I took a course of antibiotics, which often messes up the microbial balance in a body. I treated the yeast problem with over the counter medications. Then I treated it with prescription medications. Desperate, I let the doctors blast me with the heavy-duty, kidney-wrecking fungicides. No dice.
Kefir therapy finally resolved this major dysbiosis. Killing the yeast with targeted fungicides knocks down the yeast, but if the rest of the body’s ecosystem can’t shift to fill the niche, the space remains open for the yeast to grow back. Kefir contains wild yeasts which cause no disease but fill the niche and, in my case at least, help recreate a stable ecosystem. I chose kefir over commercial yogurt because commercial yogurt contains just a few species, while kefir has hundreds. It sounded like a better bet.
The basic method is to put your grains in milk and leave them on the counter until tomorrow or the next day, depending on your taste for sour. Then pass the product through a colander, reserving the grains for the next batch. That’s it. No heating anything or keeping it warm. It truly is a lazy person’s yogurt.
We use kefir made from whole milk in smoothies and chia pudding. It’s not as thick as regular yogurt, and more sour. You can drink it straight or with flavorings, and if you change it every day it’ll get pretty fizzy. I also use the same grains to culture heavy cream, resulting in the best sour cream/thick yogurt I’ve ever tasted.
Kefir also gives us our wild yeasts for bread products. Growing up in Alaska, I got addicted to sourdough. When I tried to culture wild yeast here in NC, it just didn’t work. Other people have found this too; something about the wild yeast on the East Coast just isn’t as robust. But I can pour the whey off a good sour kefir batch and dump it into flour, then treat it like a sourdough starter and get a pretty good rise that I can propagate for quite a while.
So don’t be afraid to try your hand at some home fermentation. These microbial communities are our friends, turning uninspiring foodstuffs into delicious variety, and maybe even supporting our own tiny endemic biological communities at the same time. If you’re interested in knowing more about the unseen world around us, I highly recommend reading Ed Yong’s I Contain Multitudes. What a fascinating subject.
Have you done any home fermentation? How did it turn out? Now that my kids sleep and I’m not building a house, I’m ready to try some new recipes. I’m flipping through Wild Fermentation, eyeing the tempeh and the Ethiopian honey wine.